
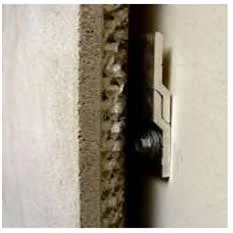
Z Clip Attachement
RECOMMENDED TOOLS
- Screw Gun
- Locking C-Clamps
- Pliers to cut shims
- Drill with bits
- 48” level & 24” level
- Dead Blow Hammer
- Circular Saw with dryand or wetdiamond tipped blade
- Screw Drivers (pry panels when shimming
INSTALLATION MATERIALS
- Z-Clips
- Glazier’s horseshoe shaped shims 1/16 inch, 1/8” & ¼” inch thickness by 2 1/2' long minimum
- No. 10 Hex Head Tek Screws
- Spray mixture of 75% water and 25% mild dish soap
- Dow Corning 795 Structural Silicone
- Masking Tape
FRAMING CONSTRUCTION
Steel stud or furring should be true and plumb and must have a maximum deflection limited to L/240, and not to exceed allowable stresses. Lateral support and bridging should be installed.
This does not provide lateral support for wall framing. The steel stud framing should have a maximum variation from a true plan of 1/8 inch in 10 feet. Defects must be corrected prior to proceeding with HyCOMB panel installation. Framing studs must be located with studs at panel joint locations.
JOBSITE STORAGE
Panels must be stored in a clean dry area, free from contaminates. The panels must be placed on a shock absorbent support such as expanded polystyrene to protect the edges, upon removal from the packaging crate.
HyCOMB panels are impact resistant and extremely durable, but, as with any Natural Stone facing, it is susceptible to chipping on theedges and the face surfaces ( especially with softer stones: Limestone, Travertine, etc…) Special care and protection should be taken in handling and staging of the product.
To be efficient all panels should be arranged in the order needed for installing.
INSTALLATION
The following instructions are intended for Vertical wall panels only.
- Coordinate with the shop drawing to laser lever to mark the exact panel location and the position of panel edges at the base of the wall. Assure that each panel edge will have framing support.
- Use a laser or level to establish the most outward point of the framing. Create a mark to determine the installation “plane” and the amount of shimming required. Use a string line from the top of the elevation to the bottom of the elevation. The string line should be set at least 2 inches from the most outward point of framing. This will be your reference line from where you will measure back from to establish the plane for all of the HyCOMB USA panel faces.
- A plumb line or laser must be set at the location where installing will begin. It is best to start with the bottom row, position the Z-Clip sections as indicated bythe approved shop drawings. Use the C-Clamps and clamp the Z-Clip section into place on the steel frame and then screw the Z-Clip sections onto the steel frame. Do not exceed a maximum of 24 inches on the center between Z-Clip or as required for the wind loads.
- Work from the bottom row to the top. The panel must be fully supported on a padded flat surface faced down. The Z-Clips must be attached to the back of the panel with screws as indicated by the approved shop drawing.
- Set stone panel in place, lean it forward and apply a table spoon of structural silicone, 24 inches on center to the framing members at the center of the stone panel.
- The stone panel must be held in place and clamped with the padded C-Clamps to the framing and shim as needed.
- Installation may progress vertically or horizontally depending on how the panels have been staged. Please pay careful attention when aligning panel joints as the panels are installed, shimming as necessary to maintain joint spacing.
- At the end of each day remove any dirt or debris from the face of the stone to protect the surfaces.